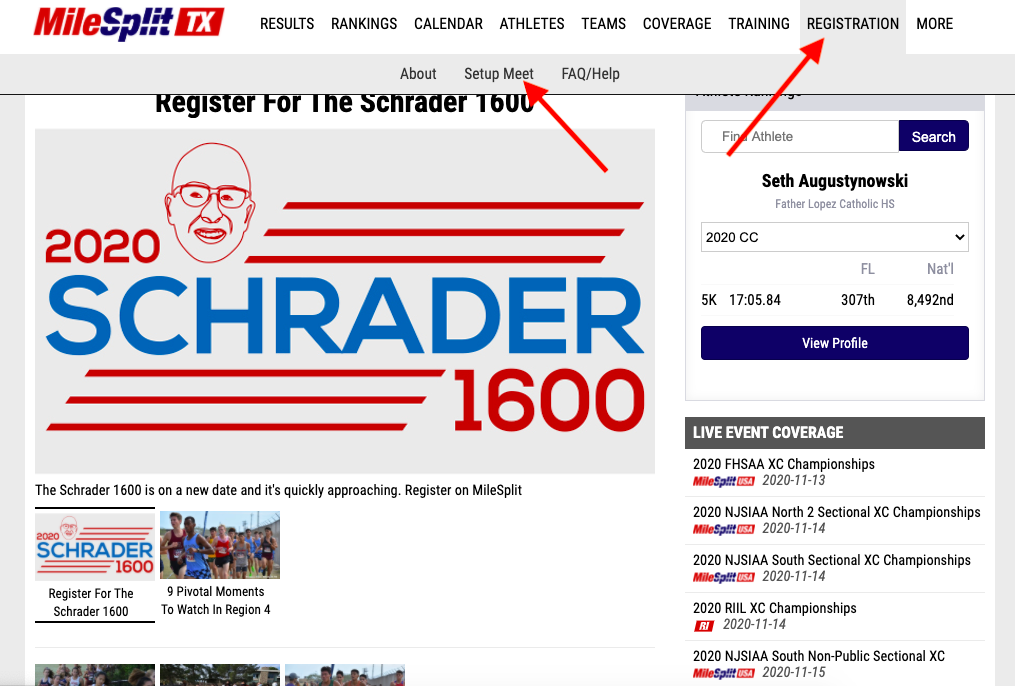
The Registration Wizard is found on your state site on the navigation bar. Scroll over the tab titled "Registration" and then click on the link titled "Setup Meet". This will take you to the first step in the meet creation process.**You have to be logged in with your coach-approved username for the host team, or your timer username with timing company attached to meet.
Page One
If this is the first year that your meet will be using MileSplit for registration, click on the box that says "Yes" when asked "Is this the first year for this meet" and then click the "Next" button in the bottom right hand corner.**If your meet has used MileSplit for registration in years past, you do not need to create your meet from scratch. This article will walk you through the process of setting up a meet by cloning the meet from a previous year:Cloning an Existing Meet
Page Two
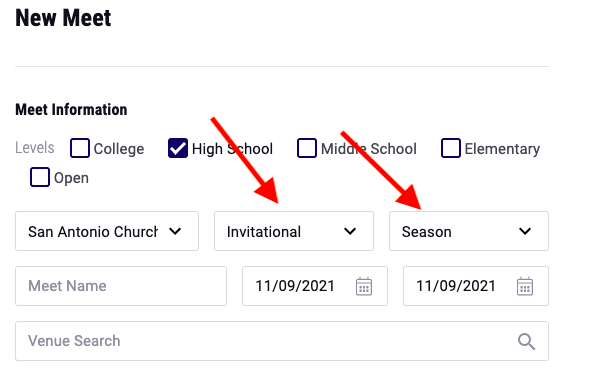
In step two, you will dictate the basic information of your meet:
Check the boxes of all of the levels that will be competing at the meet (at least one level must be selected).
The first drop down box will designate the Meet Host and the selectable options will be limited to the teams and/or timing companies assigned to your account. *If you are a timer setting up a meet on behalf of the Meet Host, you will be able to reassign the meet host within Meet Manager following the completion of setting up the meet.
The next drop down box allows you to identify what type of meet this is. Select either; "Invitational", "Dual/Tri/Quad", or "Championship" from the list. If you are unsure, mark it as an Invitational.
Next, identify what season this meet takes place in. You have the option of selecting; Cross Country, Indoor, Outdoor, or "Polar Bear" (some states may refer to this as Winter Outdoor).
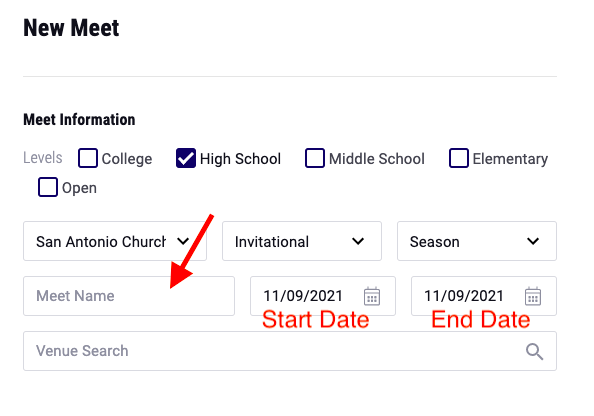
Name your meet and select the dates in which the meet will occur. If the meet is on a single day, both dates will be the same. If the meet will be on multiple dates, the left box indicates the first day of the meet while the left box indicates the last day of the meet.
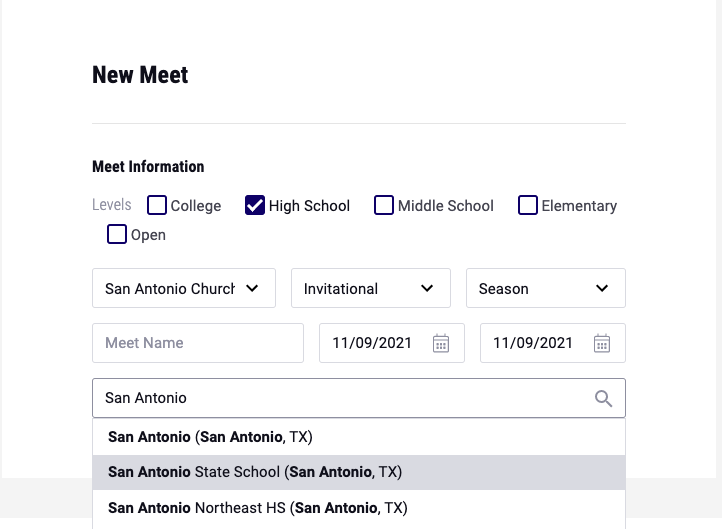
Finally, type In the Venue text bar to select your venue from our official list of venues.If you do not see your venue as a selectable option, please contact registration@milesplit.com to have us add it.
7. Once all Information has been filled out, click the "Next" button in the bottom right corner.
Page Three
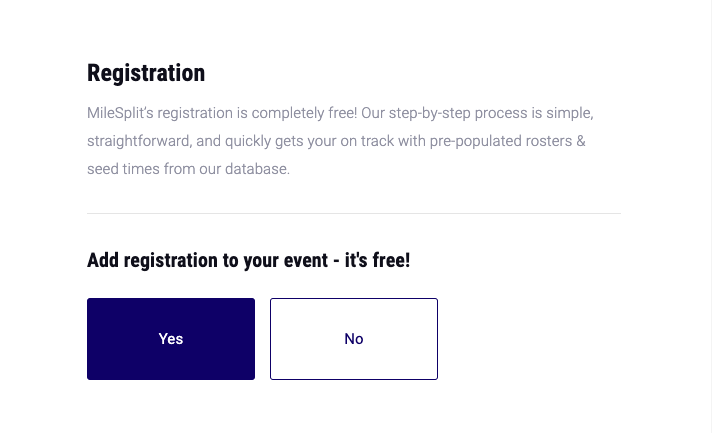
In this step, you be asked if you would like to set up Registration for the meet on MileSplit. If you intend to use MileSplit for Registration, click "Yes" and hit next. If you are not using MileSplit Registration, click on "No" and hit next, you are now done and your meet will appear on the calendar shortly.
Page Four
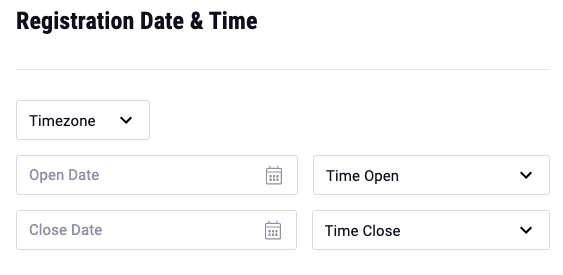
Here you will determine when Registration for your meet opens and closes(teams/athletes will not be able to sign up for the meet before or after these dates and times).
Select which time zone you are in.
Select which day and time you want to allow teams/athletes to begin registering.
Select which day and time you want to end the registration period(we recommend closing registration three days prior to the meet to allow time to prepare entries and packets).
Next, you will be prompted to proceed using a template for events and divisions or start from scratch. Depending on the type of meet you are creating, you will be presented with options and descriptions for the templates available.
After selecting an option, click the "next" button in the bottom right of your screen.
Page Five
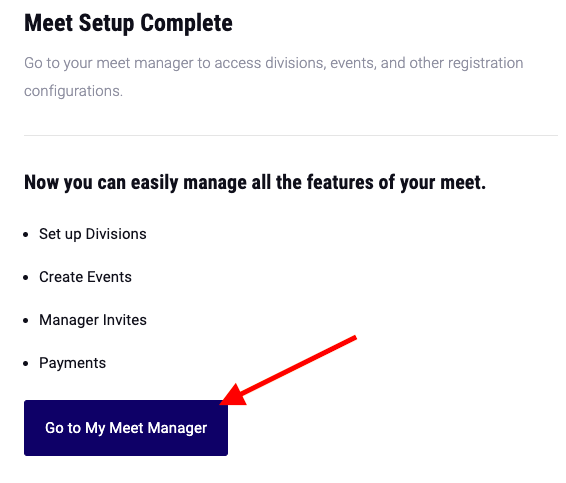
You have now completed creating a new meet! Click on the button that says "Go To My Meet Manager" to review and edit your meet.If you need to create/edit Divisions and Events these articles will walk you through the process:Setting up DivisionsSetting up EventsAnd if you would like to learn more about everything you can do within Meet Manager:Meet Manager Overview