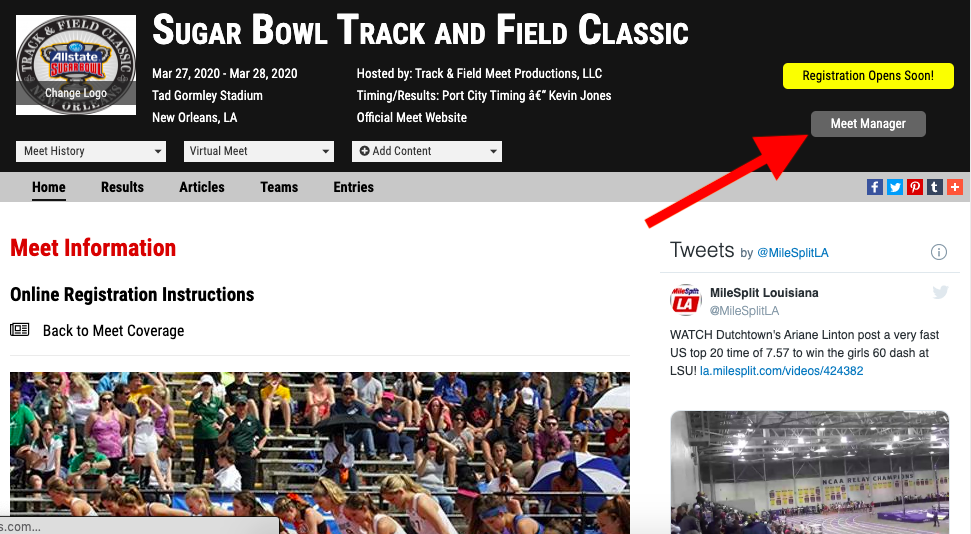
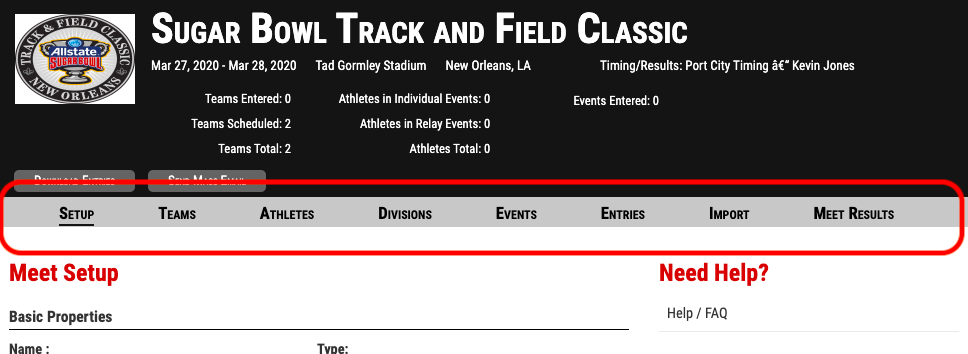
In order to access the Meet Manager functionality, you must be logged into your MileSplit account that is approved as either a coach for the "host team" or as a member of the timing company assigned for that particular meet.To access the Meet Manger, click on the "meet manager" button in the top right corner of the meet page.Just below the logo for the meet, there are two buttons; Download Entries and Send Mass Email.Download Entries takes you directly to the Entries Tab.Send Mass Email allows you to send an email to all coaches/unattached athletes, already registered for the meet, with pertinent information regarding the meet.Within the meet manager, there are eight tabs relevant to setting up your meet:Setup - Teams - Athletes - Divisions - Events - Entries - Import - Meet ResultsEach tab contains customizable settings that are vital to organizing your meet precisely how you intend. Follow the links below for an in-depth walkthrough of the settings and functionality for the Setup, Divisions, and Events tabs. Information regarding the other five tabs is detailed below.
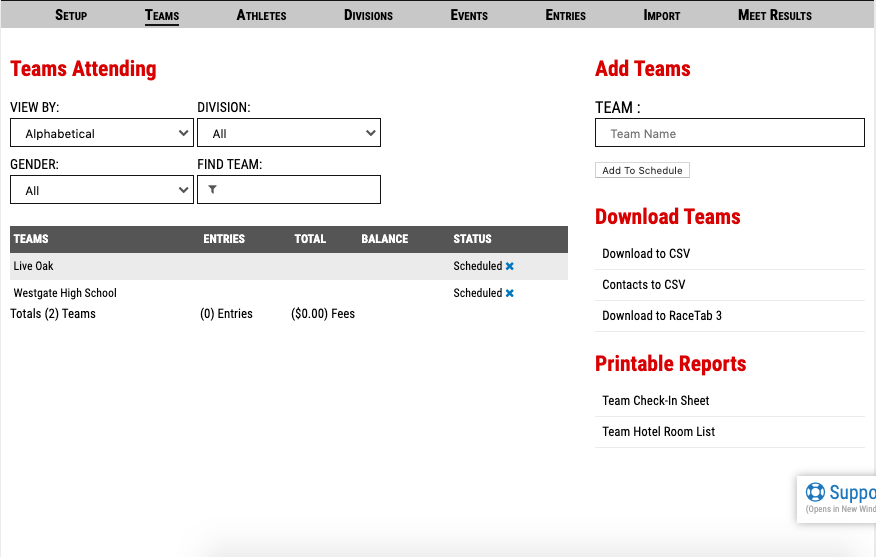
The teams pages lists the teams attending your meet. If they are linkable, they have entered the meet. It shows the number of entries per team and how much they owe if you have meet fees set in your divisions.Note that scheduled teams have not entered the meet - only put it on their team calendar and those contacts will not show, or be included in a mass email.Remove team from meetYou may click on a team name to see contact info or add or see a payment if you have fees and want to log check payments into the meet, and/or accept PayPal payments for your meet.If you need to remove a team from the meet, you may do this by clicking on the team name and under advanced options to the right, you will see Remove team from meet.Printable reportsinclude a team check in sheet.You can sort in different ways by using the filters at the top of the page.All Team ContactsLogin to meet manager, Teams tab.On right, Download Teams - Contacts to csv -You can open that in excel and get all of the email contacts.
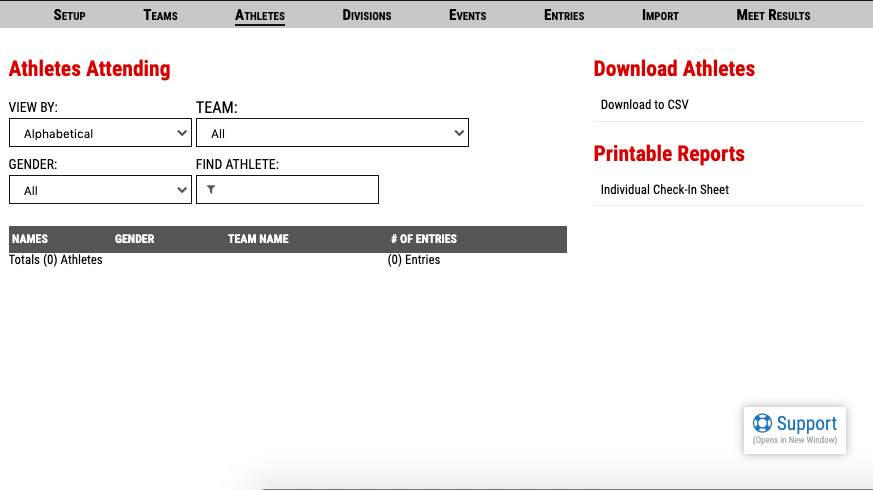
Athletes
This lists all of the athletes alphabetically in the meet.You can see the same payment and contact info for any unattached athletes here.Printable reportsinclude an unattached check in sheet.You can sort in different ways by using the filters at the top of the page.
Entries Page
Download Meet file upon registration close -Go to meet while logged in, click on meet manager button in the black header, which will be there if you are listed as the timer or approved Coach of the host team.I recommend to all meet directors/timers using our system for the first time to download the file a few days or so before the event and test import so you can see how it works and ask any questions or work out any kinks well ahead of crunch time. In the meet manager - under entries tab in gray bar under black header box, the first download to Hytek is what you would need if you are using Hytek, NOT full rosters option. There will be a page of instructions in between link and the download that you should follow. You have to set your Hytek database the way our system is set to have the meet import correctly. You have to download the Athletes and Entries. The file is a .txt download. If you are not using Hytek, there is a csv download option which imports into excel and is useable in many other formats. We also have downloads for Raceberry Jam, LynxPad and RunnerCalc as well as our own RaceTab.
Import Page
This is for Qualifying meets and auto-advancement. If you would like athlete acceptance to be determined from set qualifying meets, they will need to be already in our database. By typing in the text field, matching meets will auto-populate in a drop down, allowing you to select and specify which meets you would like to accept times from.
Results Page
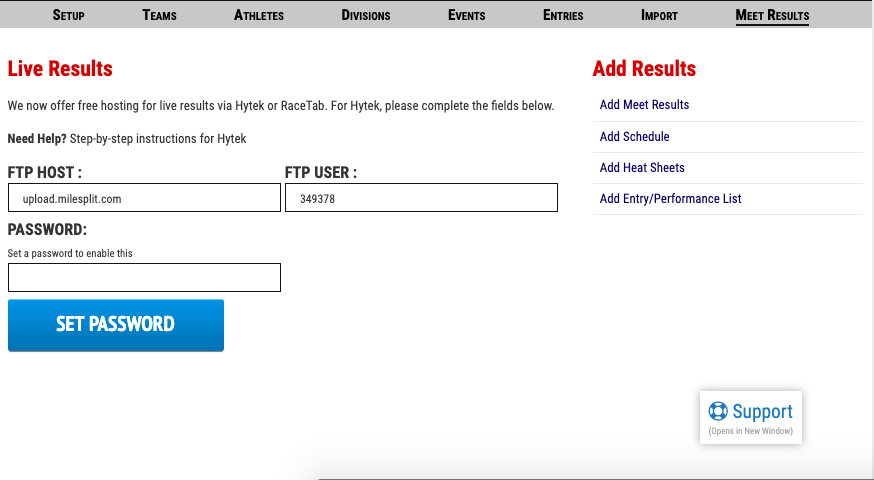
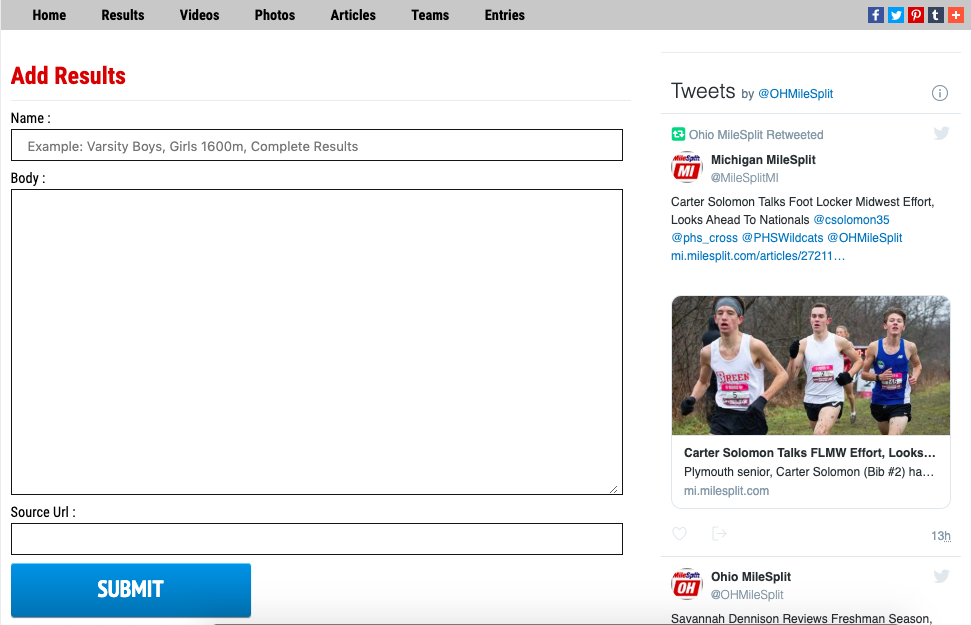
Live ResultsThis page has a place to set your password and instructions for using our Live Results.To add results, copy and paste the results into the text box titled "Body". In order to submit your results, you must provide a name for the results file in the text box titled "name". The name of the file should properly reflect what the results represent. For example if the results you are adding represent a single event you would name it that event (ex. Varsity Boys 5k, JV Girls 3200m, etc). If the results you are adding represent an entire division It should reflect that (ex. Varsity Girls Results, Freshman Results, etc.). If the results encompass the entirety of the results from the meet simply title it "Complete Results". Once complete, click the submit button to post results.Note: The results you add will not be immediately added to athlete profiles. They will only appear on the meet page in the text format you added them in. Members of the Stats team will then review the results you have added and process them into our database so that they appear in rankings and on athlete profiles.